Projects & How-To
How to Hang a Shelf on Any Wall: Drywall, Brick or Concrete
Step-by-step guide to hanging a shelf securely on drywall, brick or concrete: choosing anchors, finding studs and cables, drilling, levelling and mounting.
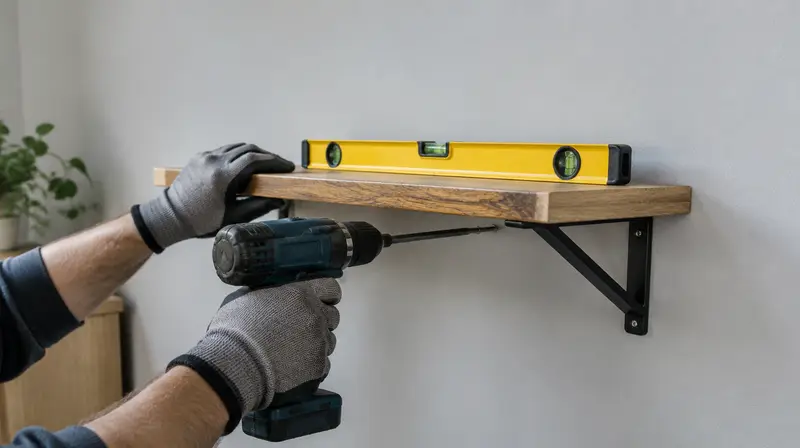
Hanging a shelf is the classic first DIY project, and it teaches the core skills of drilling, choosing wall anchors and levelling. The key to a shelf that stays up is matching the fixing to your wall type and the load. This guide covers drywall (plasterboard), brick and concrete.
Tools and materials
- Drill (combi drill for brick; rotary hammer ideal for concrete)
- Drill bits: wood/metal for studs, masonry for brick/concrete
- Stud and wire detector
- Spirit level (60 cm) or laser level
- Tape measure, pencil, masking tape
- Screwdriver or driver bits
- Wall anchors and screws suitable for the wall and load
- Safety glasses, dust mask
Step 1: Identify your wall
Knock on the wall. A hollow sound suggests drywall on studs; a solid sound suggests brick, block or concrete. Drill a small test hole in an inconspicuous spot if unsure: white powder = plaster/drywall, red/orange dust = brick, grey dust and hard going = concrete.
Step 2: Choose the right fixings
| Wall | Best fixing | Notes |
|---|---|---|
| Drywall with stud behind | Wood screw into the stud (timber) or self-drilling screw (metal stud) | Strongest option on drywall |
| Drywall, no stud | Hollow-wall anchors: metal spring toggles, snap toggles, or metal expansion anchors | Avoid plain plastic plugs for anything heavy |
| Brick / block | Plastic wall plugs (6–8 mm) with matching screws | Drill into brick, not mortar joints |
| Concrete | Plastic plugs or concrete screws; expansion bolts for heavy loads | Use a rotary hammer |
Check the load rating on the anchor packaging and include the weight of the shelf and what will sit on it. Heavy bookshelves need studs or solid masonry.
Step 3: Mark the position
- Decide the shelf height and mark a point for one end.
- Scan the whole area with a stud and wire detector. Avoid areas directly above and below outlets and switches.
- Hold the bracket (or shelf with its hanging hardware) on the mark, place the level on top, and mark the screw holes through the bracket.
- For two brackets, measure the spacing and use the level to mark the second bracket at exactly the same height. On drywall, try to position brackets on studs.
Step 4: Drill the holes
- Put masking tape over the marks to reduce chipping and catch dust.
- Choose the bit size printed on the anchor packaging.
- Set the depth: plug length + 5 mm (use a depth stop or tape on the bit).
- Drywall and studs: normal drill mode. Brick: hammer mode. Concrete: rotary hammer in hammer-drill mode.
- Drill straight and perpendicular to the wall. Vacuum out the dust.
Step 5: Insert anchors and fix the brackets
- Push plugs in until flush (tap gently with a hammer). For toggles and hollow-wall anchors, follow the packaging instructions.
- Hold the bracket in place and drive the screws. Stop when snug; overtightening can spin the plug.
- Check level again before fully tightening the last screw.
Step 6: Fit the shelf and test
Fit the shelf, secure it to the brackets if they have screw holes, and apply gradual weight by hand to test. Add items progressively.
Floating shelves
Floating shelves hide their bracket inside the shelf. They put more leverage on fixings, so fix them into studs or solid masonry. Check the shelf is level both along its length and front-to-back.
Common mistakes
- Using the plastic plugs supplied with a shelf in drywall; they are often only suitable for masonry.
- Drilling into mortar joints instead of brick.
- Drilling too large a hole so the plug spins.
- Not checking for cables and pipes.
Frequently asked questions
How much weight can a drywall anchor hold?
It varies widely: a few kilograms for plastic plugs to 20+ kg per anchor for metal toggles in good-quality board, according to manufacturer ratings. Studs are always stronger.
What if my drill bit hits metal?
Stop. It may be a pipe, cable conduit, nail plate or rebar. Move the hole and re-check with a detector.
This guide is general information, not professional advice. Always read your tool's manual, use the right protective equipment and follow local building and electrical codes. See our disclaimer.