Projects & How-To
How to Replace Brake Pads (Disc Brakes): A Careful Beginner's Guide
Step-by-step disc brake pad replacement: when pads need changing, tools, lifting safely, removing the caliper, compressing the piston, fitting new pads, torque and bedding-in.
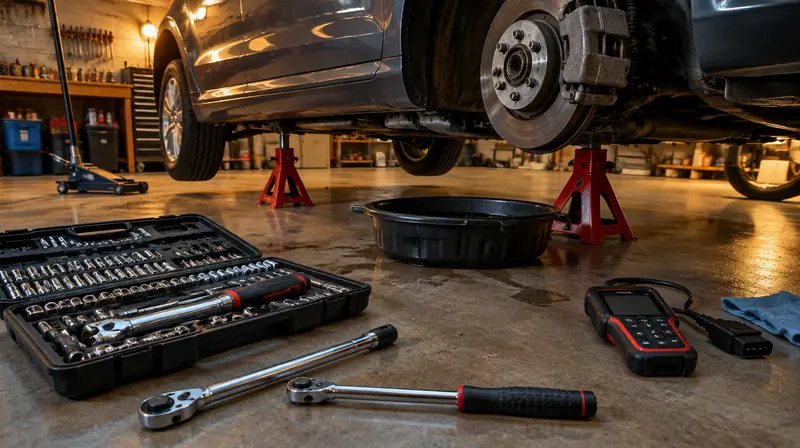
Brake pads are a common DIY job on most cars with disc brakes, and doing it yourself can save a significant amount. But brakes are safety-critical: a mistake affects you and everyone around you. Follow a model-specific procedure where possible, work methodically, and if anything is unclear, have a professional check your work.
- Cars with electronic parking brakes often need a scan tool or a specific procedure to retract the rear calipers. Forcing them can damage the motor.
- Rear calipers on some cars have screw-in pistons that must be wound back, not pushed.
- If pads are worn to the metal, discs (rotors) are probably damaged too.
- Always replace pads on both sides of the same axle.
Tools and materials
- Trolley jack, jack stands, wheel chocks
- Breaker bar and wheel nut socket
- Sockets, Torx or hex bits for caliper guide bolts and bracket bolts
- Brake piston compressor (or wind-back tool for screw-type rear pistons)
- Wire brush, brake cleaner, high-temperature brake lubricant (for pad contact points and slide pins; follow pad maker's guidance)
- Torque wrench
- Wire or bungee to support the caliper
- New pads (and discs if needed), hardware clips if supplied
- Gloves, eye protection, dust mask
When do pads need replacing?
- Pad friction material is at or below the minimum thickness (commonly around 3 mm; check your manual).
- Squealing from a wear indicator, or a dashboard warning from an electronic wear sensor.
- Grinding noise (metal-on-metal: stop driving and inspect).
- Scheduled inspection shows uneven wear.
Step 1: Lift and support the car
- Loosen the wheel nuts slightly on the ground.
- Lift the car and support it on jack stands. Chock the other wheels. Remove the wheels.
Step 2: Remove the caliper
- Check the brake fluid reservoir: if it is at MAX, remove a little fluid with a clean syringe so it does not overflow when you push the pistons back.
- Remove the caliper guide bolts (often two, sometimes one with a pivot), holding the slide pin with a wrench if needed.
- Lift the caliper off the pads and hang it with wire. Never let it hang by the brake hose.
- Remove the old pads and any clips. Note how they were fitted (photograph).
Step 3: Inspect and clean
- Check disc thickness against the minimum stamped on the disc, and look for deep grooves, cracks or a large lip. Replace discs in pairs if needed.
- Clean the caliper bracket where the pads sit with a wire brush; rust here makes pads stick.
- Check slide pins move freely; clean and re-lubricate with the correct grease. Check rubber boots are intact.
- Wear a dust mask; brake dust should not be blown with compressed air.
Step 4: Retract the piston
Use the compressor tool to push the piston slowly and squarely back into the caliper. On screw-type rear pistons, use the wind-back tool to rotate and push. Watch the fluid reservoir. On cars with electronic parking brakes, put the system into service mode first.
Step 5: Fit the new pads
- Fit new clips/shims if supplied. Apply a thin film of brake lubricant only where specified (usually pad ears and backplate contact points, never on the friction material or disc).
- Fit the pads into the bracket (and any wear sensor).
- Refit the caliper over the pads and tighten guide bolts to the specified torque. If you removed the bracket, torque its bolts too (often much higher; threadlocker may be specified).
Step 6: Reassemble and pump the brakes
- Refit wheels, lower the car and torque wheel nuts in a star pattern.
- Before moving, pump the brake pedal several times until it is firm. The first press will go almost to the floor as the pistons move out.
- Check the brake fluid level and top up with the correct DOT type if needed.
Step 7: Bed in the pads
Follow the pad manufacturer's bedding procedure. A typical method: in a safe, empty area, make several moderate stops from about 50 km/h (30 mph) to walking pace, then several from higher speed, without coming to a full stop and holding the brakes, then drive gently to cool them. Avoid harsh braking for the first 200 km or so.
Frequently asked questions
Do I need to bleed the brakes after changing pads?
Not normally, as long as you did not open the hydraulic system. Brake fluid should be replaced at the interval in your manual.
Should I replace discs with pads?
If discs are below minimum thickness, scored, warped or have a large lip, yes. Many manufacturers recommend new discs every second pad change.
This guide is general information, not professional advice. Always read your tool's manual, use the right protective equipment and follow local building and electrical codes. See our disclaimer.